The Complete Guide to Camper Van Soundproofing and Insulation
Updated on: June 2026
Struggling with how to soundproof your camper van? I totally get it. It can be a real puzzle figuring out where to start, right? Well, you’re in luck because in this blog, we’re going to walk you through exactly how to do it.
I’m speaking from experience. My partner and I built our camper van from the ground up. We’ve poured hours into researching every little detail about soundproofing and insulation. We’ve been living in our van for over two years now, so we’ve learned a thing or two along the way. Stick around, and we’ll share all our tips and tricks to help you turn your camper van into a cozy, quiet retreat.

Van Vibration And Resonance
There are many methods to construct a van, as you know. It can cost hundreds of dollars or tens of thousands of dollars. You have complete control over how basic and straightforward or high-end and complicated you want it to be.
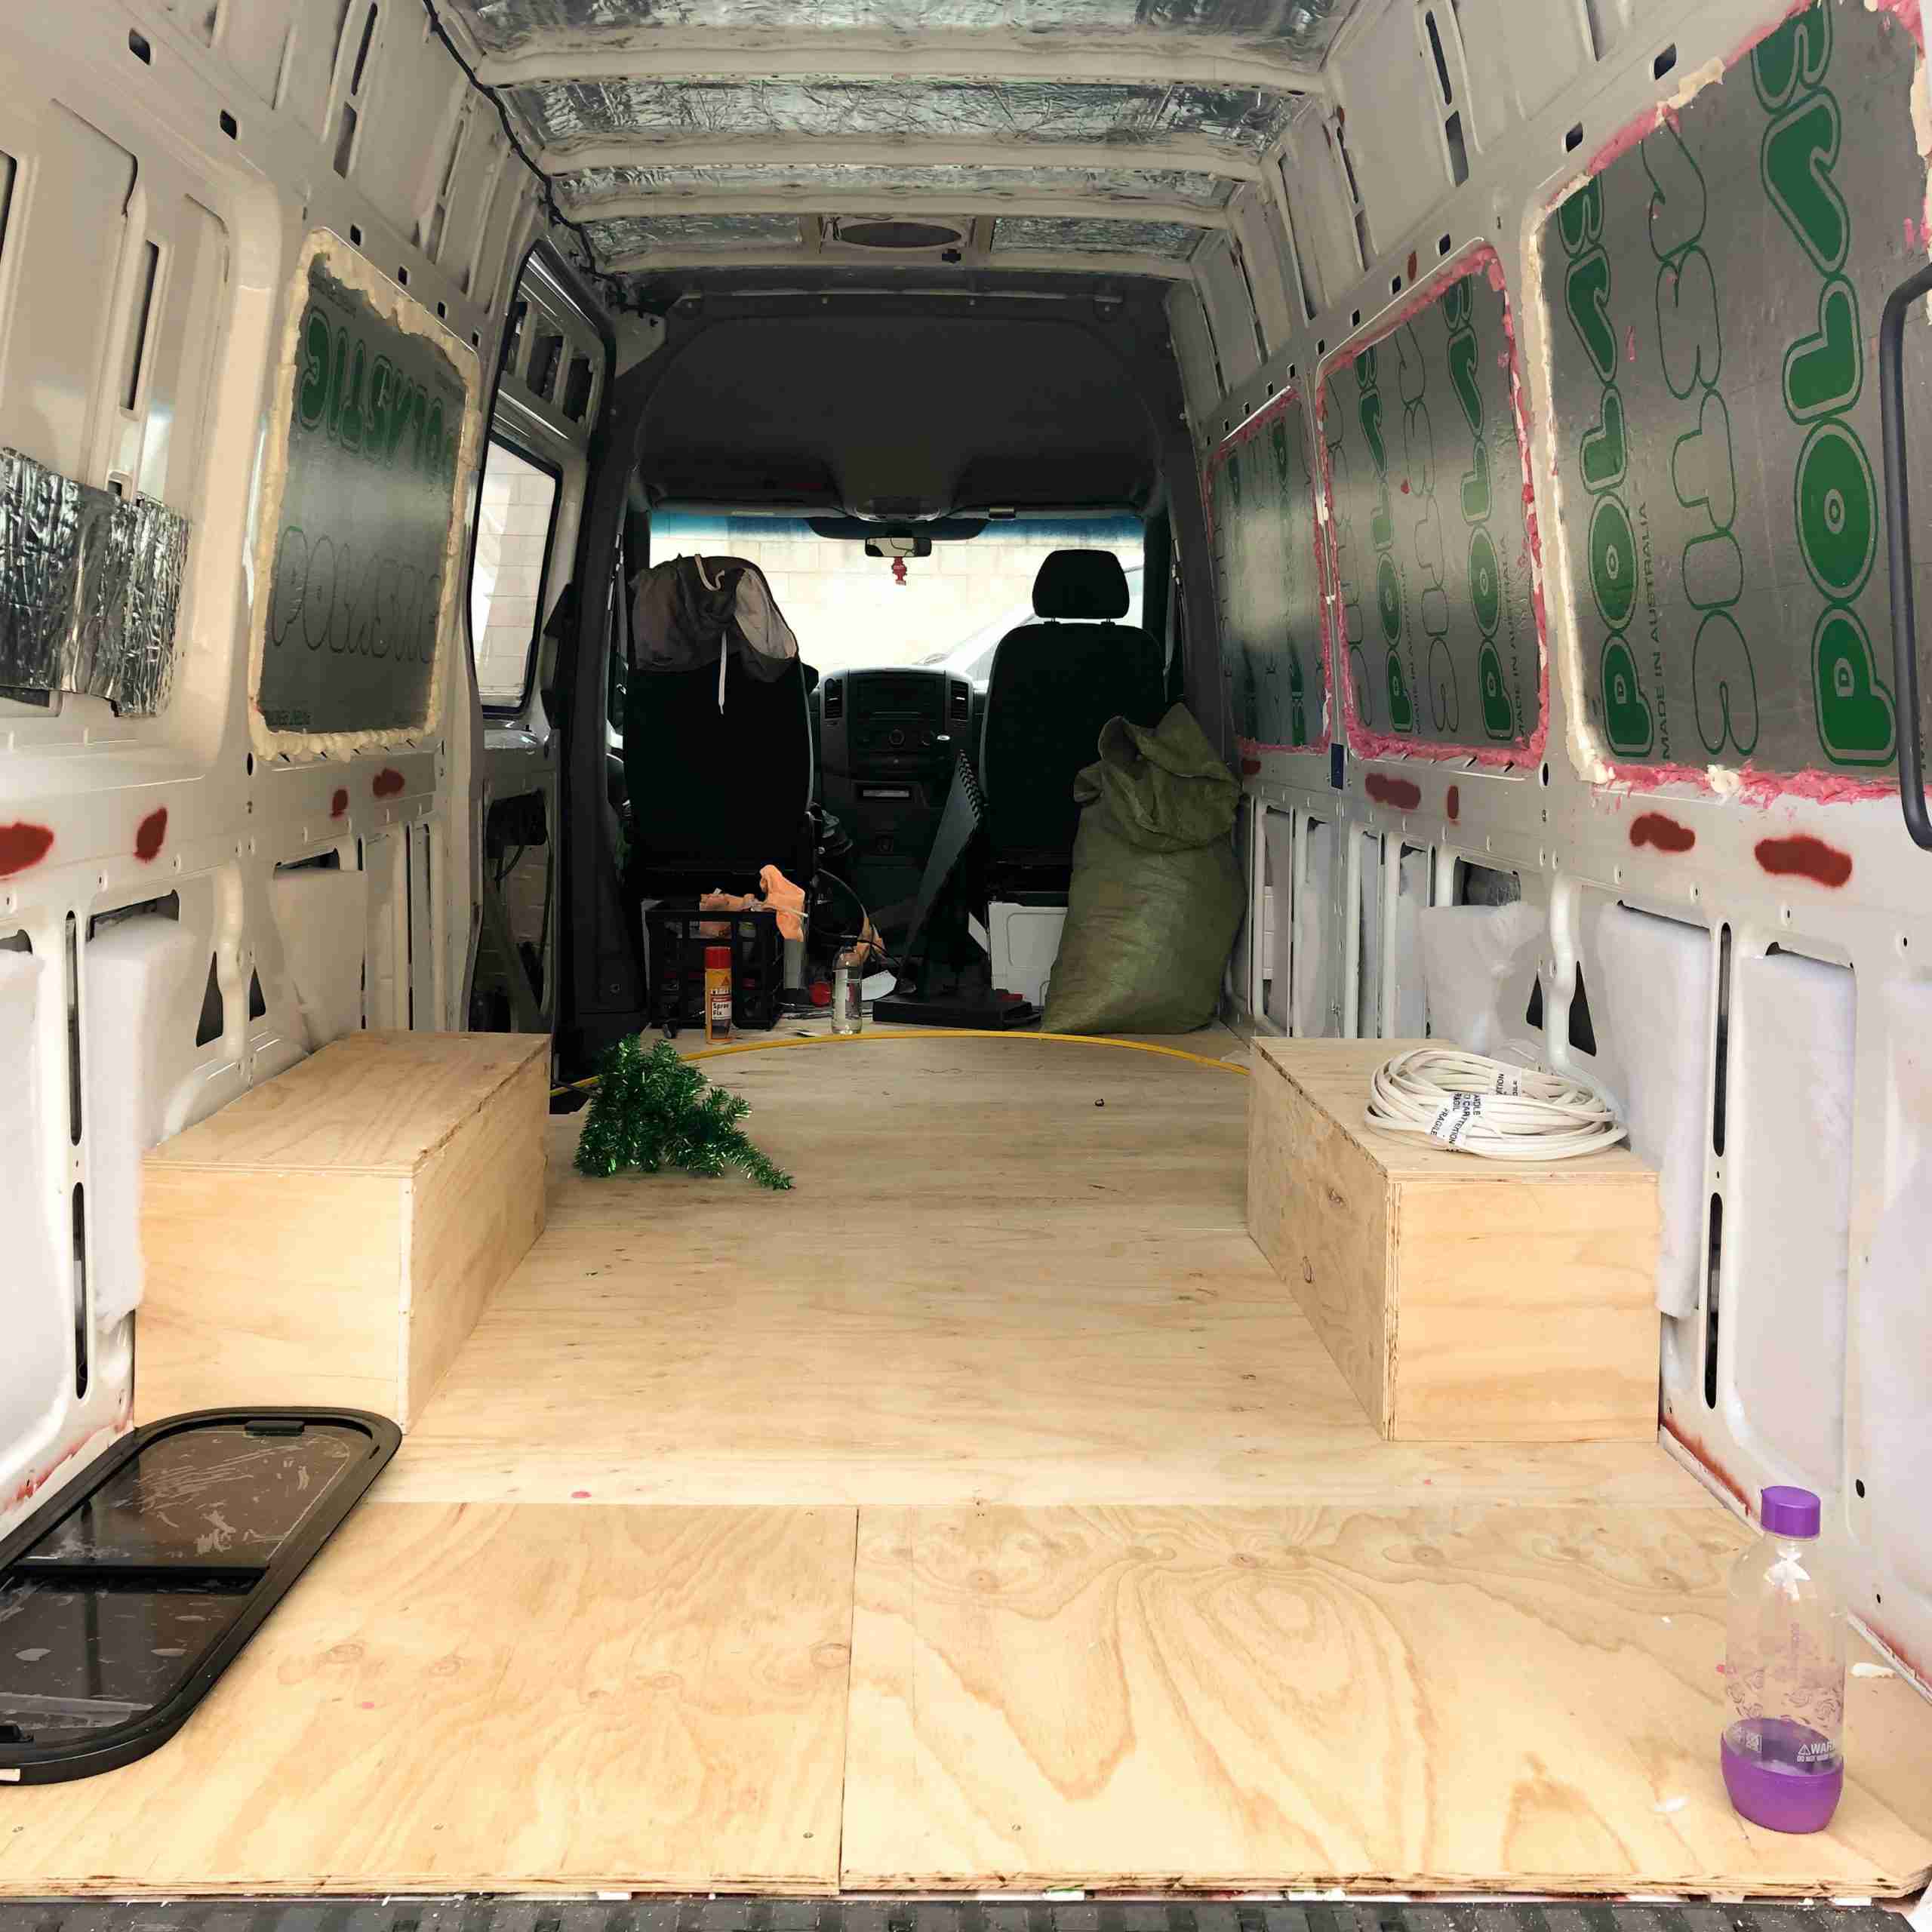
The materials you choose have a significant impact on the cost of your vehicle, with some variations being due to style and colour. Sound deadening, insulation, wall panelling, and wood type are crucial factors to consider while designing a robust building.
A sturdy build is crucial for van life because of the road vibrations and continuous engine noise. Vibrations can not only damage the frame but also be very loud. Cargo vans aren’t made for quiet road trips; they’re intended for business use. Therefore the vehicles road noise and passers-by may make it difficult to stealth camp. However, with a soundproof van, you can convert any cargo vehicle into a comfortable camper van.
Is it Worth Insulating and Sound Deadening a Campervan?
Yes, To minimize road noise and vibrations, use a sound dampening material. These items aid in isolating outside noise while retaining sounds inside, so you may enjoy the quiet inside the vehicle and be less readily heard from the outside. They are generally placed directly on top of metal van walls after the insulation has been added.
Car builders is a popular peel and stick product that can be applied to your vehicle to dampen road noise. The secret is in the high viscoelasticity of the material.
To put it another way, if you stretched the product, it would take a long time for the material to return to its original form. This slow deformation reduces the passage of sound waves when a sound wave strikes one side of the substance.
This is a strong impact, and it only takes a little sound deadening material (as little as 25% of a large surface) to dampen vibrations travelling through your van walls.
Peel-and-stick sound deadeners are a simple remedy for a lot of noise and are relatively inexpensive to install. If you want to add a sound dampener, this is the method most people take.
It’s best to cover the interior of your panel van with it. It’s perfect for inside walls, ceilings, cabs, floors, wheel wells, doors, and under the hood. 5-7 square meters is usually enough for the main sections of a panel van; however, if you want to cover everything within, you’ll need extra.
How do You Soundproof a Camper Van?
Sound deadener is simple to apply. If you’re going to install it, this should be one of the first stages of your project. Sound dampening materials will be stuck to the metal of your camper van. It goes beneath any insulation or moisture barriers that may be applied. It’s also worth noting that you don’t have to cover the entire surface to be effective.
Step 1. Clean The Walls
The first step is to clean the surface on which you intend to apply the sound deadener. Remove any body panels, dirt, or grease from the location. Before using the adhesive, make sure that the area is completely dry. Moisture might prevent the sound deadening panels from bonding correctly. You don’t want your sound deadener to start coming off
Step 2. Measure and cut the right amount
Take accurate measurements of each section of your car if you want full coverage. A cardboard template may be pretty helpful here. Draw out your cut lines with a marker. Sound deadener can be cut to size with a pair of scissors or a knife in a matter of seconds.
Cutting strips of 20 to 40 cms pieces is a fantastic method to put everything together when it comes to weirdly shaped surfaces like a wheel well or cab floor.
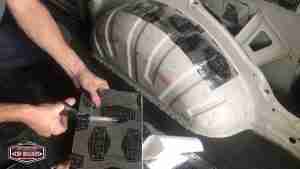
Step 3. Peel and Stick
The sound dampener is as easy to apply as peeling off the adhesive and putting it on the metal surface. For the best outcomes, avoid touching the sticky side with your hands.
Make sure each strip is in place before pressing firmly. If the sound deadener doesn’t entirely cover an area, no problem! You can always cut another piece to size and attach it on top.
Source: The Restoration Couple
Step 4. Wheel Arches
Although a small amount of coverage is adequate on the walls and ceiling, you might want to cover the wheel wells fully. This location receives a substantial quantity of tire, road, and exhaust noise.
By covering the wheel wells, you’re reducing vibration as well as attempting to block noise with the material’s mass entirely. Deadeners aren’t really made for this purpose, but they do assist a little bit, so don’t go overboard unless you intend on doing it right with different materials.
Tip: heating the material will make it more malleable for curved surfaces.
Step 5. Use a roller
The final step is critical. To function correctly, deadeners must be firmly installed. It is strongly suggested that you utilize a roller press, bottle, or some other device while installing the insulation. It’s dangerous to apply pressure with your hands because the foil’s edges are sharp!
After the sound deadener is in place, it’s best to wait a total of 24 hours before doing anything else. This will let the adhesive cure and set properly.
Now that you know how to soundproof your camper van. You are ready for some insulation.
What Insulation Should I Use for My Van?
After that, you’ll start thinking about insulation. The way you insulate your van will have a significant impact on the inside’s climate control. Proper insulation will keep the van cooler in the summer and help it retain heat in the winter.
R-value is a measurement for insulation materials that indicates how well a material can resist heat flow. The greater the R-value, the more effectively a substance resists heat flow. Some substances have a higher R-value than others, and what sort of insulation is best is an open question.
Aside from the R-value, there are a few more things to consider while selecting insulation.
The first thing you should look for in RV insulation is water, mildew, and mold resistance. Condensation can be a problem in camper vans since the insulation does not allow moisture to escape.
Second, you want something that is simple to install if you’re doing it yourself.
Third, many types of insulation, such as fibreglass, contain hazardous chemicals that need to be considered during installation. Finally, the cost is a factor.
there are many products available, and we will go over the most common that are used for campervans

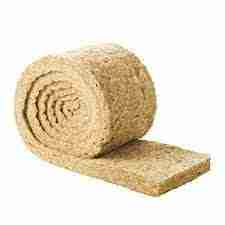
Sheep’s Wool Insulation
Sheep’s wool is a potential van insulator. Sheep’s wool is an environmentally friendly material that has been praised as such. It has a somewhat higher R-value than other choices, and it’s less expensive, includes natural moisture-wicking properties, and provides acoustic sound proofing advantages.
Sheep wool is one of the most protective types of insulation for a camper van. It’s no more hazardous than a wool coat. Wool is not only safe, but it also has beneficial effects on the environment inside your vehicle. Air quality and moisture control are both improved with wool.
PIR Foam Boards
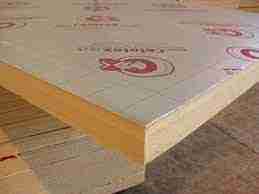
The PIR board is a rigid foam board insulation that’s frequently used in green building and van conversions. It has an outstanding R-value per inch of R-6 and is quite simple to work with.
The PIR generally comes on one side as a foil-faced material, which serves as an effective vapour barrier and gives a radiant heat barrier if you add air gaps.
PIR is entirely non-toxic and releases no dangerous toxins. Although not nearly as green as sheep’s wool insulation, it’s also considerably more environmentally responsible than the XPS board.
Closed-Cell Spray Foam Insulation
The two common types of closed-cell foam spray foam are the large spray kits used to insulate homes and the smaller cans of spray foam.
Spray foam insulation has the greatest R-value per inch of any spray foam product, with an R-7 value. It also serves as a sound insulator. When installed properly, it forms an impenetrable vapour barrier that can protect your van’s walls from condensation. It’s also effective at sound deadening.
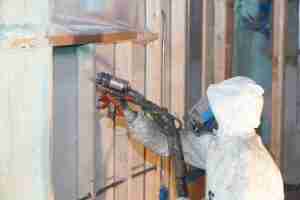
On the other hand, Foam insulation is relatively pricey – in order to use foam for your entire van, you’d be spending around $1000. The process might also be somewhat frightening and messy. If you do it incorrectly, it could become a disaster.
Canned spray foam is quite affordable and works well in filling gaps, cracks, and hard-to-reach areas.
Spraying foam is an excellent insulator, and if you’re okay with the added cost and installation time, it may be a good alternative. However, rigid foam board is much less expensive, easier to work with, and just as effective in insulating.