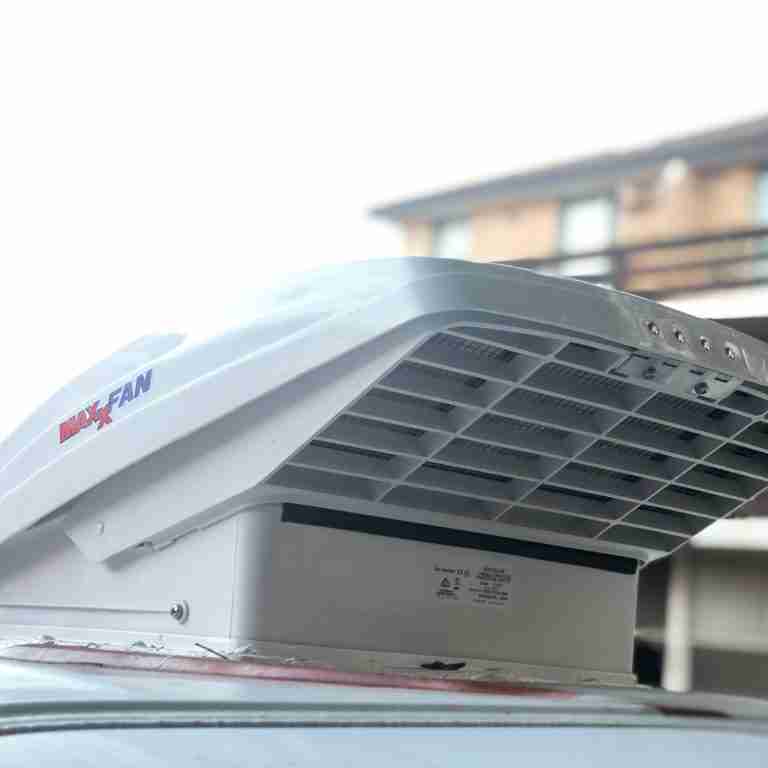
Maxxair Fan: Step By Step Guide On How to Install
Updated on: July 2026
Vent fans are a must-have for any camper van, whether you drive an expensive luxury van or anything in between. Vent fans help prevent moisture build-up during winter and make it comfortable no matter what season!
We believe it’s an affordable solution to air conditioning, so we have put together a guide on how you can install your own Maxxair fan.
The Tools You Will Need
Installing a fan is relatively straightforward. However, it does require using a few tools that you may or may not have available.
Here’s a list of equipment I used for the job.
- Cardboard – for creating a template. It’s a shame that it doesn’t come with one, but making one is straightforward.
- Sharpie – for marking the template onto the roof.
- Jigsaw – A jigsaw is the best tool for cutting out a hole. Other saws may be used instead, but nothing compares to a jigsaw in my view.
- Jigsaw blade – ideally 36 blade ensuring that the cut is smooth as can be.
- File – for cleaning the cutout edges after the hole has been cut.
- Rustoleum paint – for painting the raw edges of the cutout to assure no rust or corrosion in the future.
- Drill – Use a drill to make the holes that hold your fan frame in place on the roof.
- Butyl tape – You need to use a sealant on the screws when putting the fan on.
- Self-levelling caulk/sealant – for a last layer of sealing.
All of these can be found at your local hardware store like Bunnings
 Top Rated | MAXXFAN DELUXE WITH RAIN DOME, THERMOSTAT, POWER LIFT AND REMOTE |
Deciding On The Placement
The Maxxair Fan comes in a standard 356×356. This makes the fan suitable for use on RVs and camper van.

Your layout determines the fan’s location in your camper van conversion. Venting fans work best when drawing fresh air into the fan and exhausting it out the top of the fan.
To create an air flow tunnel, some vanlifers with larger vehicles install two fans to vent the air in and another to expel it.
If your kitchen is toward the front of your van, you might consider having two vents: one near the bed and another near the front. This way, there will always be a fresh, cool breeze flowing through your home!
Take a close look at your roof’s layout (both inside and out) for good or bad locations for a vent fan.
Some Sprinter vans and Ford Transits have holes in the roof ribs to allow for the placement of a vent fan. Vans may have thick horizontal structural ribs that would be difficult to chop through.
Cutting The Fan Opening
It may be intimidating to start the fan install process. Cutting a giant hole in your new van is permanent, and it seals your decision to construct a van.
Don’t be concerned! This is part of the adventure. You’re transforming it into your own tiny home, and while it might appear to be a massive project, you won’t do anything that makes it unsafe to drive.
Step 1 – Wipe your roof clean with a soft cloth and a dab of alcohol. All of the grime and oil residues are removed in this way.
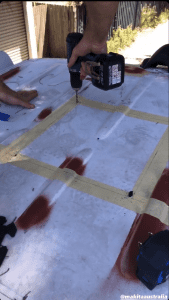
Step 2 – Tape a square of 356×365 over where you want your fan to go. To keep a flat surface as level as possible, try to avoid the roof ribs or deep curves.
Step 3 – Drilling starter holes in the four corners of your tape template.
Step 4 – Connect the dots by cutting a straight line between your starting holes with a jig saw. A Jigsaw is the simplest way to accomplish this. If you don’t have a jigsaw, an angle grinder or metal sheers can be used instead.
Pro Tip: We cut out a 356×356 square on cardboard to use as a templated. It also helps to visually see where your fan will be installed before cutting.
Cleaning Up The Edges
Rust is the van lifer’s worst enemy. The last thing you want to do is buy a costly fan only to have your roof rust a few years later. These are the measures you may take to avoid this:
Step 1 – Take care of the corners. File down all the edges to remove any sharp edges or jagged parts.
Step 2 – Paint the cut lines to conceal them. Painting over exposed metal will keep it safe from rain and condensation. Use a coat of Rust-Oleum for optimum results.
Pro Tip: Have a large plastic bag under your hole to catch off the metal shavings for easier cleanup.
Installing Maxxair Fan Flange
It’s time to install the flange once the hole has been cut, smoothed, and painted to prevent rust. The fan’s plastic frame is known as a flange.
Sealing against moisture is critical. As a result, it’s a good idea to lay down some butyl tape.
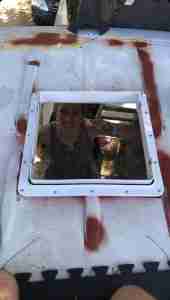
Step 1 – Place the flange on the roof and clamp it. This is used as a pattern for pre-drilling holes to ensure that everything is level from top to bottom. The fan will be attached to connector points on the flange. Rotate the flange so that the fan is opening front-to-back.
Step 2 – Pre-drill mounting holes into the ceiling. To drill holes in the suitable locations, use your flange as a guide. Remove the metal clips afterwards.
Step 3 – Run butyl tape around the top perimeter of the flange. Butyl tape will serve as a gasket between your roof and your flange. This is another approach to keep moisture out of your home.
Step 4 – Attach the flange to the roof. To prevent cracking, hand-tighten with all the screws provided.
Step 5 – Run a thick bead of sealant around the flange and over the screw holes to protect them. It also helps to create a waterproof seal. This is a messy operation! Have some paper towels on hand.
Step 6 – Simply slide the vent fan into the flange, install four easy screws, and you’re done!
Pro Tip: To help prevent sealant from going all over your hands. Dip your finger in water with dishwashing liquid before touching the glue. It will not stick to your fingers.
Optional: Adding a Roof Adaptor for a Vent Fan
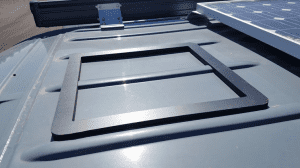
A roof adaptor is a piece of plastic with depressions and a gentle bend that is used to level off the vent fan surface.
The adaptor has concavities and a slight bend to match the contour of your van. It can also aid in the layout process as a bonus.
Cut and clean the hole in the roof as you would typically, then cover the bottom of the adaptor with 3M Marine Sealant and clamp it to the roof until dry. Install the vent fan flange as usual after that.